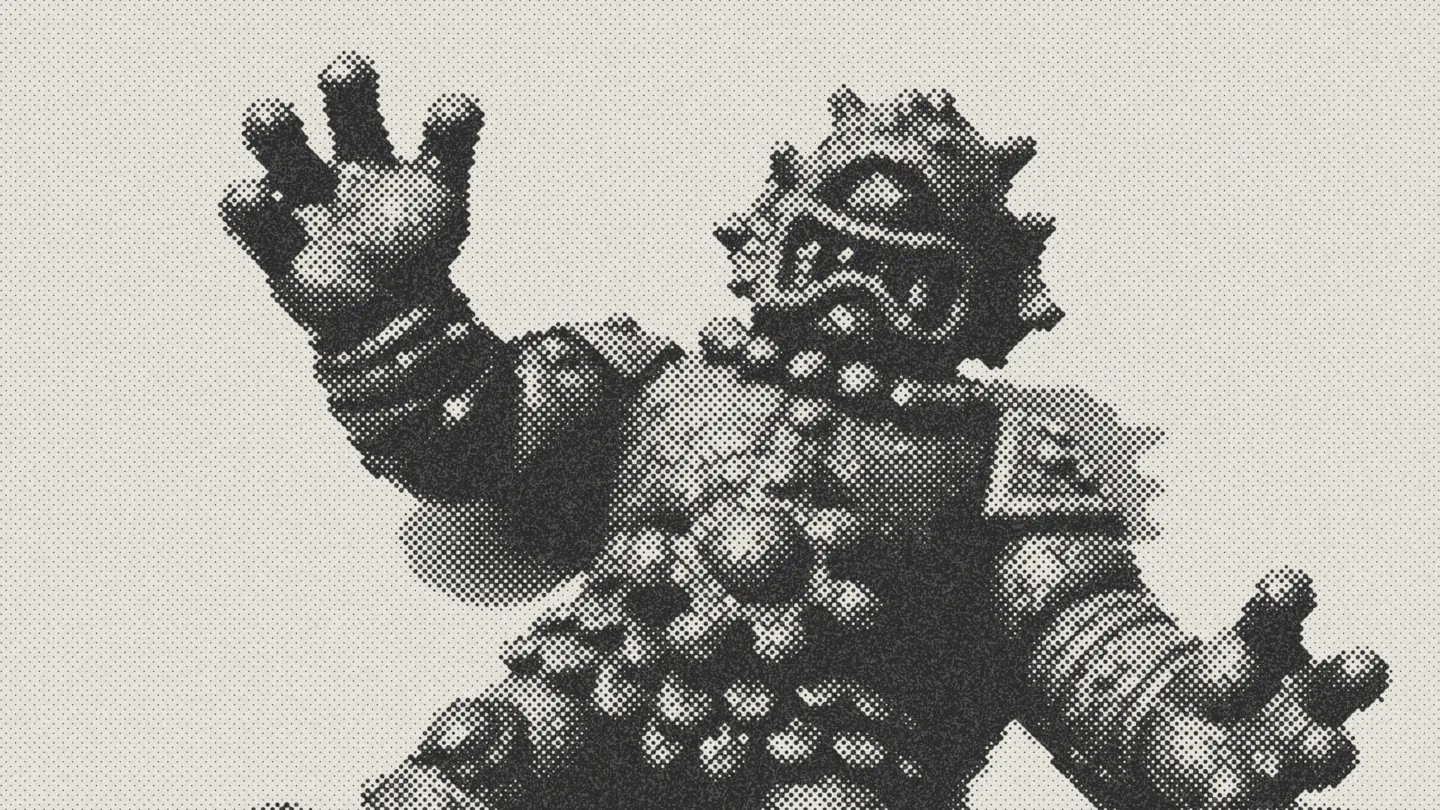
I had M.U.S.C.L.E. Men and Monster in My Pocket toys as a kid. Small, strange characters with enough personality to make a whole world out of a handful of them. I wanted to make a few of my own.
To turn my AI-generated images into 3D-printed toys, I made front, side, and back references in plnty.app, generated a detailed GLB with Meshy through Higgsfield, exported an STL manually in Blender, and sliced it in Bambu Studio for printing. The result was two little gray figures in my hand. The same characters now tumble out of the top drawer on this website.
We turned the successful image-to-model process into my Higgsfield Reference to GLB skill, so the workflow could be repeated with the next character. The downloadable skill is the practical companion to this article: it carries the generation settings, failure checks, and Blender inspection steps.
The useful part of this experiment is that the image was a starting point. Once the character existed as a three-dimensional mesh, I could make different versions for different jobs.
The toys I wanted to make
I was after that chunky pocket-figure feeling: oversized hands, heavy boots, a face you could recognize immediately, and lots of little sculpted details. The characters are new designs inspired by the toys I grew up with. The fish king, boar warrior, and cyclops belong together without being the same figure with a different head.
The initial salmon-pink treatment helped establish a consistent molded-toy look. Later, the hot pink, green, and blue experiments gave the digital versions another direction. The actual prints shown here are gray. The material, scale, and surface finish of a physical print are separate decisions from the color of an AI image.
Start with three views
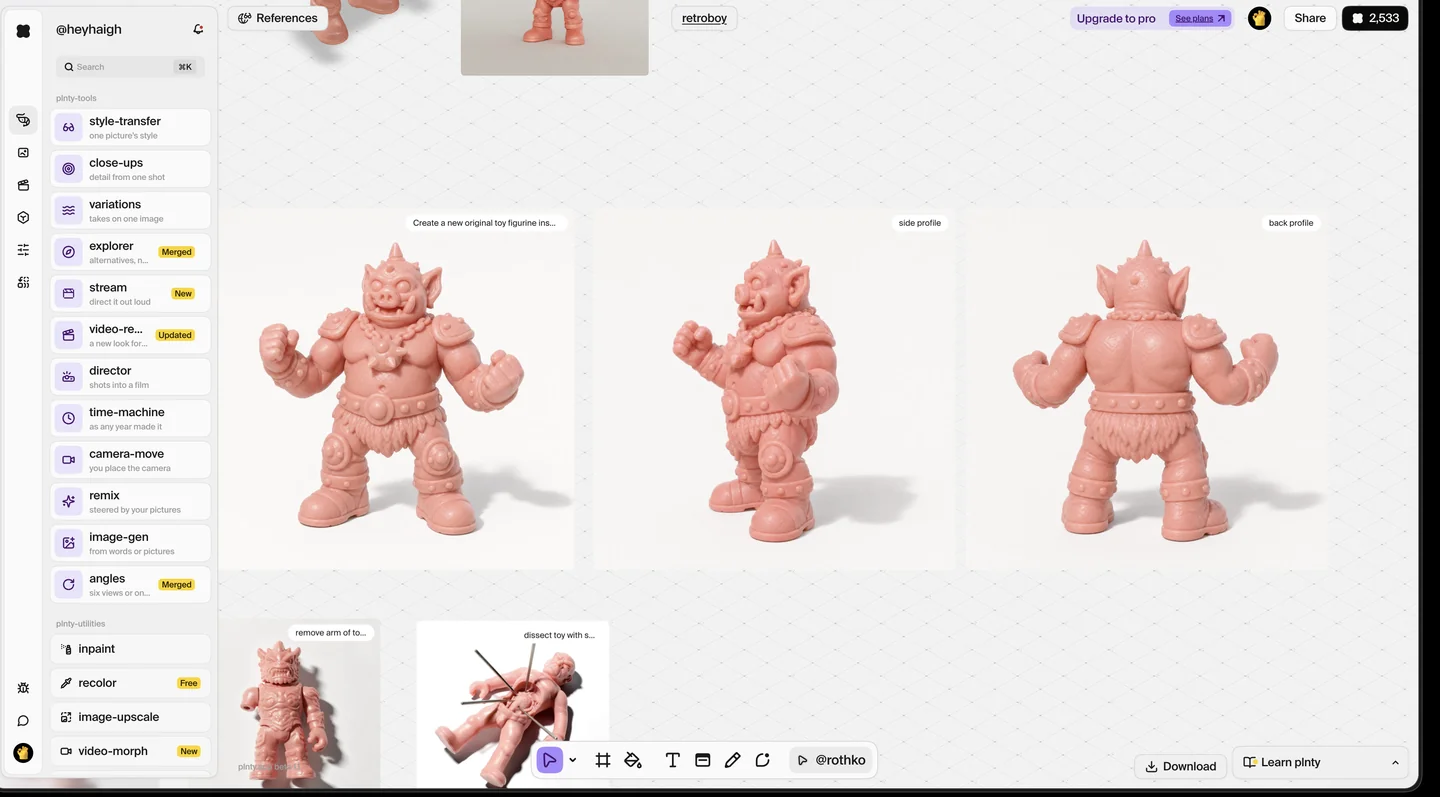
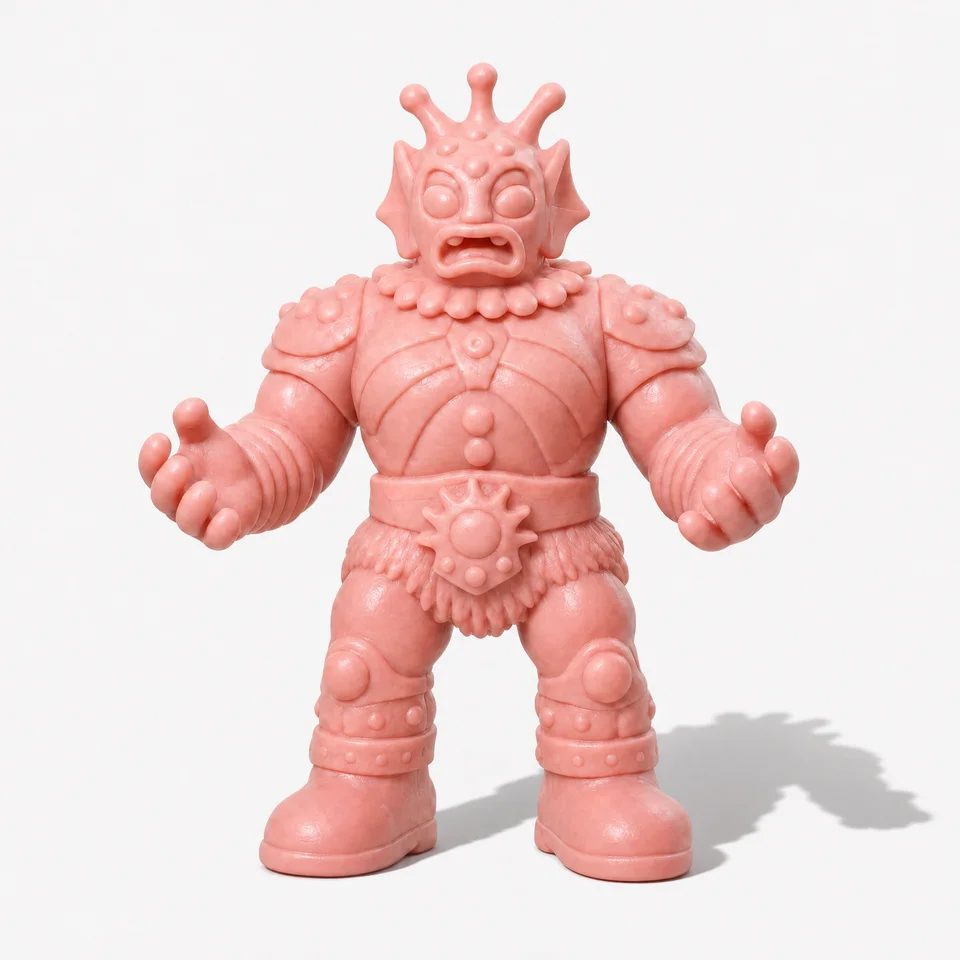
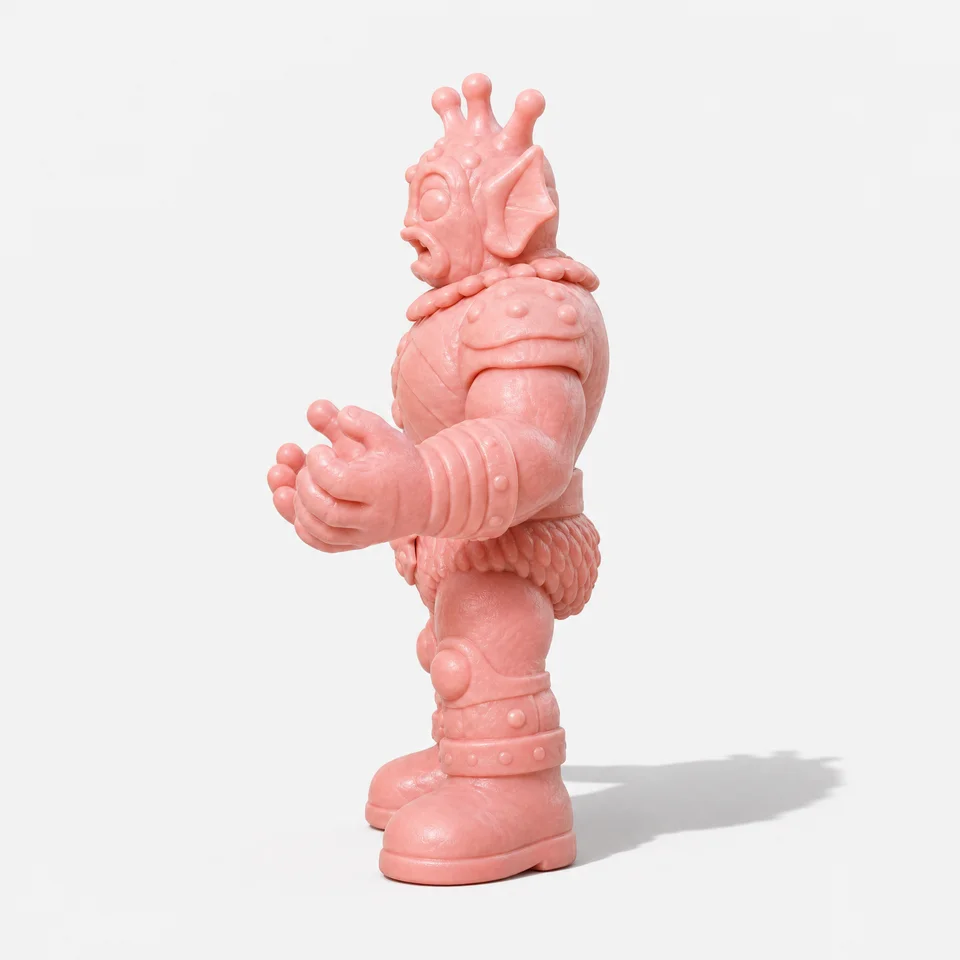
I used plnty to develop the characters and make front, side, and back views. The screenshot below shows that process for the boar warrior; the three individual images below it are the fish king references we used for its reconstruction.
Front view
Side view
Back view
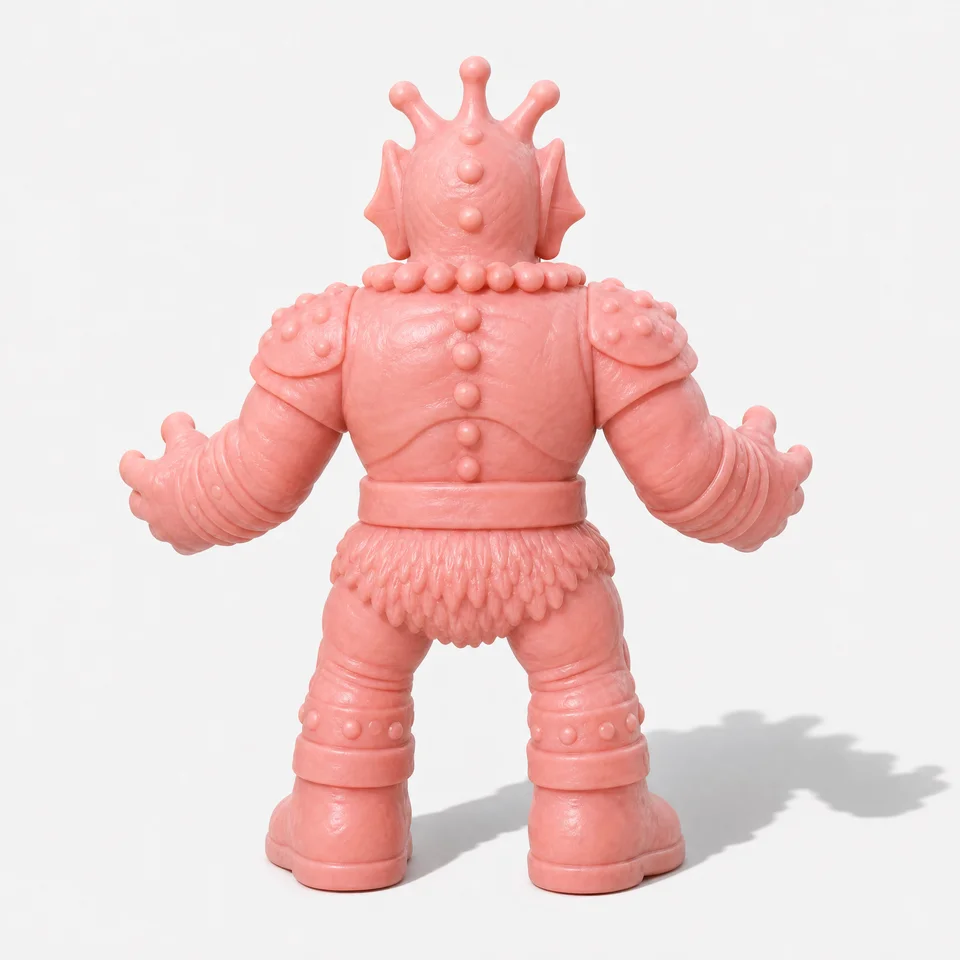
The views need to agree on the things that define the character: its pose, proportions, clothing, head shape, and accessories. If a crown changes between angles or an arm moves to a different position, the reconstruction has conflicting evidence. More images are only useful when they describe the same object.
I kept the backgrounds simple and the whole figure visible. We supplied the original image files rather than small chat previews. These are generated views, so I treated them as a design reference rather than precise measurements of an existing object.
What failed before it worked
The path above sounds much cleaner than it felt at the beginning. My first request was to turn the references into an STL through Higgsfield. If that was not possible, I suggested making a GLB and exporting it from Blender. We spent several attempts trying to reach the printable-file end of the process before we had a model that looked right.
We did produce STL files. I was not happy with the figures inside them. That distinction matters if you are trying this yourself: a successful export and a convincing reconstruction are different milestones.
A modeled approximation missed the character
The first route used Blender geometry through Higgsfield’s 3D Jutsu to construct an approximation of the fish king. It gave us a model and an STL, but the sculpt did not capture the supplied character accurately enough. We had reused an approach that worked for simpler desk objects on the website. The face, fingers, fins, and layered armor of this organic figure asked much more of it.
The lesson was to check how the geometry was actually being made. Working inside a 3D tool did not mean we were using image-to-3D reconstruction. Exporting or repairing that approximation could not recover the likeness it was missing.
Reference textures hid missing sculpted detail
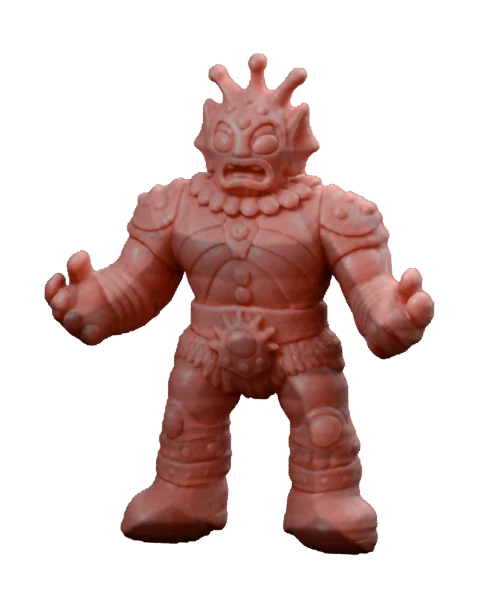
Next, we tried a model built from the front silhouette, with rounded depth and front/back reference images projected onto it. It could suggest the figure from certain views, but the depth was inferred. Much of the face and armor detail lived in the images on the surface rather than in the mesh.
That was especially unsuitable for the STL handoff. STL carried the underlying shape and left those photographic details behind. The saved checks reported one connected component and zero non-manifold edges in the exported mesh. Those were useful structural checks, but they did not tell us whether the figure resembled the reference. A mesh can pass those checks and still be the wrong model.
Front view
Side view
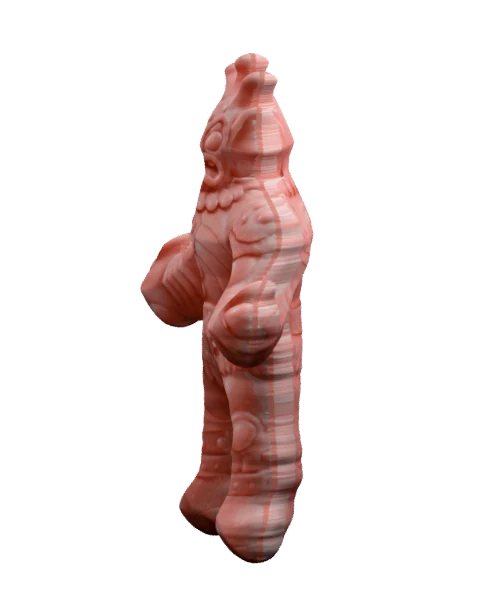
Compare these views with the original character references above. The side view is the giveaway: the painted face and armor do not turn into the rounded, fully sculpted figure I wanted. This is why I would inspect a full rotation before spending time on the print export.
The turning point was changing the immediate goal
I asked us to focus on creating a very accurate GLB and stop worrying about the STL for the moment. The improvement came when we switched to actual Meshy multi-image reconstruction through Higgsfield and inspected the result from several angles. Merely changing the output extension would not have solved the earlier problems; we needed better source geometry.
That became the order I would recommend repeating: judge the likeness and volume first, preserve the detailed GLB, then make the print export. I handled the accepted model’s STL export manually in Blender. This was not a one-click Higgsfield-to-printer success.
Tool access and failed jobs were separate problems
There was also confusion about which tool could run the generation. The connector listed Meshy in its model catalog, but its image-generation call rejected the 3D model. That was a mismatch between the tool we were calling and the job we wanted to submit. The official Higgsfield CLI provided the working route.
Even after the fish king succeeded, the cyclops failed in another session. It later succeeded with the same three source images and geometry settings after fresh uploads and a shorter material prompt. The successful attempt also happened later, so we cannot say whether the uploads, wording, or a temporary provider problem made the difference. We did not establish that those failures were caused by insufficient credits.
The useful habit is to save the job ID, inspect its status, and check charges or refunds before trying again. A timeout while waiting is not proof that a job failed. The skill below records those checks, keeps material prompts concise, and separates reconstruction from print preparation. It preserves what we learned without presenting an unexplained retry as a guaranteed fix.
The skill behind the workflow
Once we had a result I liked, I wanted to preserve the process—not just the finished model. We packaged it as Higgsfield Reference to GLB, an authored skill that an AI agent can follow when I bring it another set of character references. The boar and cyclops gave us a chance to reuse that process and improve the instructions when something failed.
Try the reference-to-GLB workflow
Download the skill for the generation settings, failure checks, and Blender inspection steps used here.
The ZIP includes the workflow instructions, setup guidance for Claude Code and local ChatGPT desktop/Codex work, and a Blender inspection helper. It keeps four parts of the job together:
- Check the route and inputs. Use separate, consistent reference images; confirm that the available tool can submit a real Meshy 3D generation through Higgsfield. If the connector only lists the model, use the supported official CLI route.
- Generate the detailed source. Validate the current model settings, request a textured GLB, preserve the reference pose, and save the job record. Prioritize the character’s likeness before making a small web version or a print export.
- Handle failures deliberately. Inspect the existing job and credit transactions before retrying. Keep the original records and avoid duplicate paid submissions when a wait times out.
- Inspect the result in Blender. Check front, side, back, and three-quarter views, preserve the original GLB, and describe visible differences from the references.
To use it, download and unzip the package, follow its README for your agent’s setup, and attach the original reference files. A starting request is:
Use the Higgsfield Reference to GLB skill to create a detailed, textured GLB from these front, side, and back references. Preserve the pose and material, then inspect the result from all four angles in Blender.
You’ll need your own Higgsfield account and credits, a supported generation tool or authenticated CLI, and Blender in an environment where the agent can work with local files. The download contains instructions and a readable inspection helper; it does not include credentials, source images, generated models, or those applications.
The skill ends with a reviewed GLB. My manual STL export and the website’s simplified models are separate steps below. That separation lets me reuse the same detailed source for either destination.
From images to a real mesh
The result I liked came from Meshy’s multi-image-to-3D generation through Higgsfield. In our setup, the successful submission used Higgsfield’s official CLI and the multi_image_to_3d route. The official CLI documentation is the starting point for that route.
We deliberately focused on getting a detailed, convincing GLB first. Print cleanup came later. The recorded settings for the accepted fish king were:
| Setting | Our run |
|---|---|
| Inputs | Separate front, side, and back images |
| Texture / PBR materials | Enabled |
| Remeshing | Enabled, triangle topology |
| Target polygon count | 300,000 |
| Symmetry | Automatic |
| Rigging / animation | Disabled |
The texture prompt asked for the salmon-pink molded-vinyl material, a softly glossy finish, and no extra colors, lettering, floor, or background. The images carried the shape and pose. Higgsfield identified the provider as Meshy, but did not expose an underlying Meshy version, so I cannot give a more specific model name.
The accepted fish king contained 312,111 triangles, with embedded 2048-pixel material images, in a roughly 20 MB GLB. That was close to our target rather than exactly 300,000 triangles. We inspected front, side, back, and three-quarter renders in Blender. The crown, hands, face, armor, and skirt had real depth, although some proportions and fine details still differed from the references.
The manual Blender step
I exported the STL manually in Blender. The AI-assisted step produced the GLB; I handled the handoff to a printable file. Keeping those steps separate made it easier to judge the model before thinking about slicer settings.
GLB was useful for inspection because it carried the mesh and its materials together. STL carries the surface geometry for the printing handoff. The pink color and material appearance do not become colored filament just because the original GLB looked pink.
For the same handoff in Blender:
- Import the GLB through File → Import → glTF 2.0.
- Inspect the figure from several angles, including the undersides of the hands, feet, and mouth. Keep the original GLB as your source.
- Select the figure’s mesh objects and export through File → Export → STL, using Selection Only to exclude inspection-scene objects.
- Check the resulting dimensions in the slicer. Export scale and scene-unit choices matter; do not assume the GLB’s displayed size is already a millimeter print size.
Blender’s STL documentation describes the selection, scale, and scene-unit options. An STL export is a format conversion; it does not itself prove that the mesh is ready to print. A good-looking texture can also hide geometry that needs attention.
Print your own fish king
My original Blender STL export, unchanged · 15.6 MB. In your slicer, set its height to 43.2 mm with uniform scaling before choosing your print settings.
STL does not store a unit of measurement, so check the imported size before slicing.
Printing at 43.2 mm
I imported the STL into Bambu Studio and set the figure height to 43.2 mm, matching the M.U.S.C.L.E. Men scale I was aiming for. I printed on a Bambu X2D using PLA. I also tried PETG for a color I wanted, but it did not perform as well on these figures. That is the outcome of this experiment, not a claim that PETG cannot print small models.
At this size, the outside surfaces matter a lot. A beautifully detailed screen model is being reduced to a figure that fits between two fingers. I adjusted the settings to reduce visible layer lines while leaving the less-visible internal work faster:
| Setting | What I used or adjusted |
|---|---|
| Figure height | 43.2 mm, with uniform scaling |
| Layer height | 0.12 mm |
| First layer | 0.20 mm for reliable adhesion |
| Variable layer height | Adaptive, with Smooth Mode enabled |
| Outer wall speed | 50 mm/s |
| Outer wall acceleration | 1,500–2,000 mm/s² |
| Inner walls and infill | Kept faster than the exterior |
| Wall generator | Arachne |
| Top surface pattern | Monotonic line |
| Seam | Aligned or painted toward a hidden edge |
Ironing the topmost solid layers is another option for smoother flat tops; it is not a way to smooth every curved surface on a figurine. I would also inspect the sliced layers around the fingers, crown, chin, and arm overhangs before committing to a print. Orientation and support decisions need to follow the particular figure and your printer profile. This table is my surface-quality approach, not a complete slicer preset.
The tradeoff is time. For the same height at a uniform layer thickness, moving from 0.20 mm to 0.12 mm means roughly two-thirds more layers. Adaptive heights and the thicker first layer change the exact count, and slower exterior walls add time too. Keeping inner walls and infill faster puts more of that extra time into the surfaces you actually see.
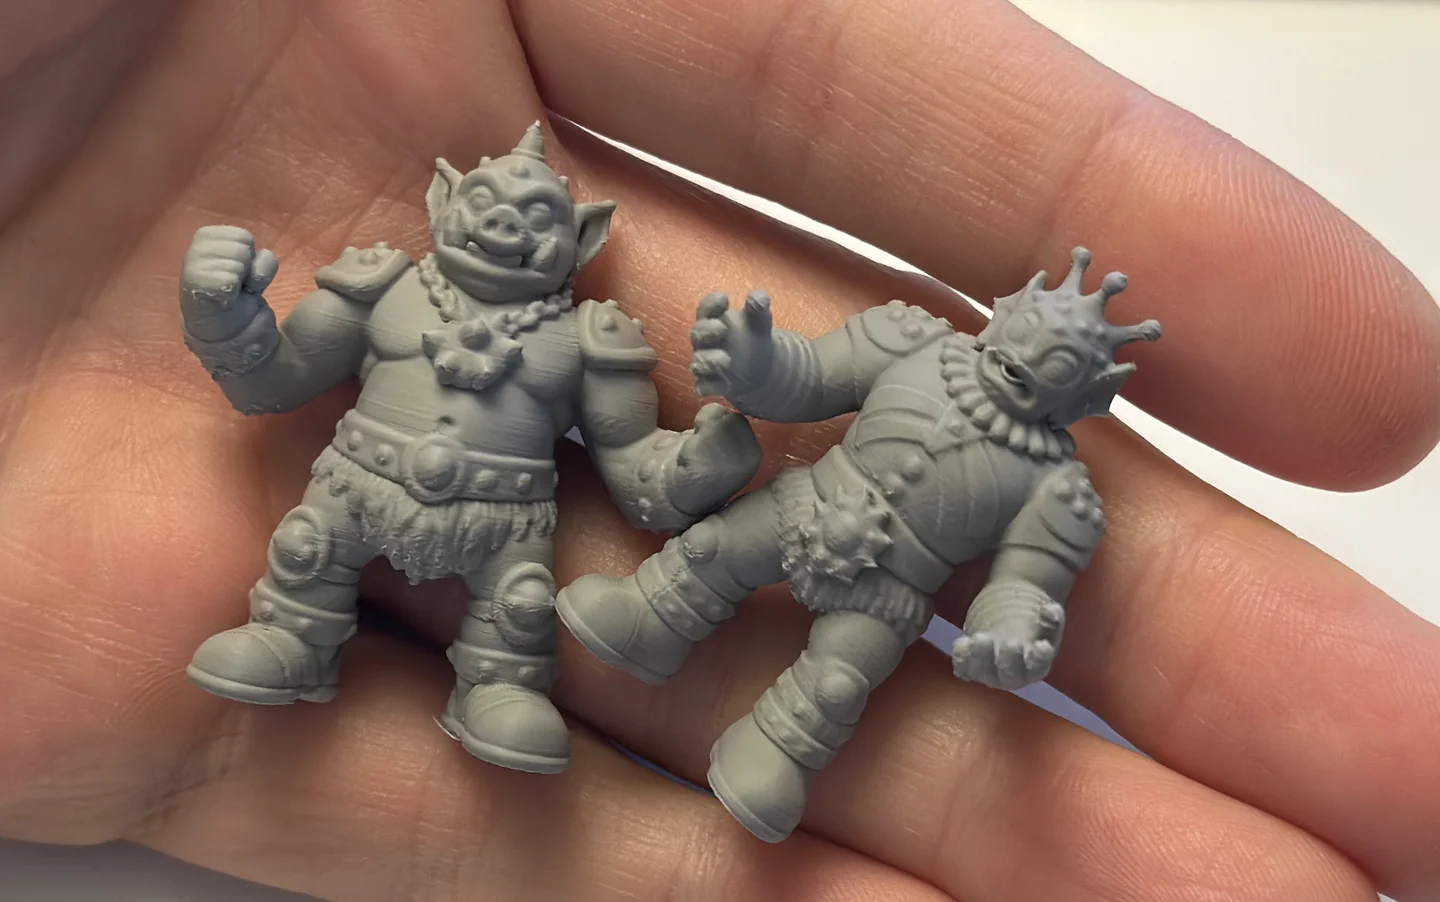
The photo is the useful comparison with the original images. These are small layered prints, with their own finish and limitations. But the characters made the trip: I can recognize the faces and armor, and hold both figures in one hand.
A second life in the drawer
Making the 3D file opened up another use that had nothing to do with the printer. I brought the same three characters into the desk scene on my homepage.
The original detailed GLBs would have been excessive for toys that appear only a few pixels high. We made separate web derivatives at roughly 800 triangles per character. All three simplified GLBs total about 208 KB. The detailed source models stayed intact for other uses.
Each click of the top drawer launches three figures. They receive a random character and a hot pink, green, blue, or coral color, then bounce and scatter around the rug. They keep piling up until the page reloads. The toy layer uses an isometric floor, approximate furniture collision shapes, depth masks, and lighting tuned to the scene’s lamp and rug highlights.

The drawer movement is a separate piece of the illusion. Higgsfield’s Kling 3.0 generated an opening clip, and we used only its first second so the drawer stops at a small crack. The site plays that portion as a short, reversible hover animation, with matching light and dark image sheets. The figures originate inside the opening and render in front of the moving drawer face.
That distinction matters: the desk is still artwork with animation layered over it, while the little figures are actual 3D meshes. The collision and shadow approximations make the two feel like they occupy the same space. You can try the top drawer on the homepage.
Repeat the workflow
To turn another set of AI images into a 3D print, I would repeat these five steps:
- Create consistent reference images of the same character from the front, side, and back.
- Use the Higgsfield Reference to GLB skill to submit a textured Meshy reconstruction and preserve the generation record.
- Inspect the GLB from every angle. Check the actual sculpted shape, not just the surface texture or whether the mesh passes structural checks.
- Export the selected model as STL in Blender, keeping the original detailed GLB for other uses.
- Set the scale and inspect the sliced layers in Bambu Studio. My figures were 43.2 mm high and printed in PLA; supports and other settings depend on the model and printer.
For a different starting point, my guide to 3D printing The Met’s open-access scans follows existing museum models through the GLB-to-STL handoff.
The Higgsfield Reference to GLB skill is what makes the reconstruction step repeatable. I can bring it a new character’s views and start from the lessons recorded here, then decide whether the result belongs on a print bed, in a browser, or somewhere else.
My favorite part is how far the original image traveled. A little creature on a canvas became something I could turn around in Blender, hold in my hand, and scatter across a website. Each version needed its own decisions, but I did not have to start the character over every time.